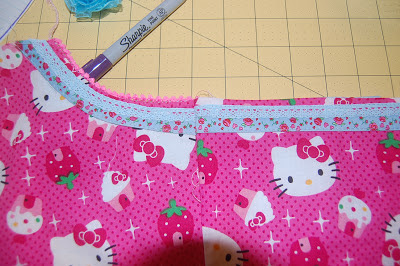
Today we are going to "fuse" up those side seams. Nope, it's not a new cool sewing technique I'm going to teach you... it just rhymed. HAHA :) Today is hard and let me tell you why... trims trims TRIMS. It's hard to decide?! If you don't have a stash - count yourself lunch. You have fewer choices :) If you like to embroider?? Today is a day I suggest you embroidery some little buttons and patches :) I hate having to hoop up a garment... but I love to embroidery on craft felt or even a woven cotton and then applique that to my garment later!!
K folks - today we are making a leg :) not a leg hole yet... but a leg. After you added those trims up top to both pieces (if you desire!) then you lay them RIGHT side together and sew/serge up the straight side. Don't go serging up the crotch/curved seam!! :) I've done that before... trust me, it doesn't turn out so hot ;)
There is a close up for ya... complete with my head shadow :) Now -- Farbenmix also asks you to press the seam allowances on the inside to the front and topstitch them down! I didn't... because, well, I didn't want to! But it does add extra row of fun stitching options!
Here I am again with my head in the picture :) OOPS Sewing at night = using a flash camera. Anywho -- NOW you need to trim off the bottom edges OR hem them up. You can go elaborate or simple! It's obvious what I chose. NOW -- I layed down my little pom pom trim RIGHT sides together and I stitched it down. I serge/overlock mine on. I prefer to add trims that way - it's always spaced JUST right. Finishes my edges too!! You do have to do some magic around that corner... but just go slow and pay attention. Pull your fabric flat and straight as you go.
Next -- you would press your trim in and under to the other side and stitch. Now - if you are adding a ribbon or a front sided trim only - you would press and/or hem FIRST and then add the ribbon. Think about it first though - you have some sharp corners to turn and edges, so I with with stretchy options.
Now --- wait, before you sweat, no you were not suppose to add the other layer yet or do anything else. I just failed to take a picture... so this is my only chance to show you my trim turned under and stitched. You can see I added an organza stretch elastic ruffle too -- I simply stitched it on after I pressed the hem under. Just look closely and you'll see :)
NOW STOP - we'll add that blue under layer tomorrow and the other stuff you see going on!! No sweating allowed, ok?? :) And if you goof up.... cut your trim off and try again. It's just the top layer - it won't change the length of your pants... just changes the top little layer :)
And I'll end today the same way I did the other day... with a poopy diaper change. Don't worry folks, it's my sons... not mine. :)


No comments:
Post a Comment